(Document Management users only)
Use the following procedure to view and/or print archived transactions from the Document Archive Viewer. Transactions you can view include sales, credits, orders, special orders, estimates, transfers, layaways, and ROAs. You also have the option to save transactions to your PC, and, if you have the E-mail Invoices application, you can email them as well. If you have the Document Scanning application, you can also view archived scanned and imported documents in the Document Achive Viewer; click here for more information.
![]()
Transactions that can be edited and saved without printing, such as orders and special orders, are only stored in the Document Archive if they are printed.
You can only print archived documents on a printer set up in Eagle for Windows. You cannot print to a printer set up in legacy MPS.
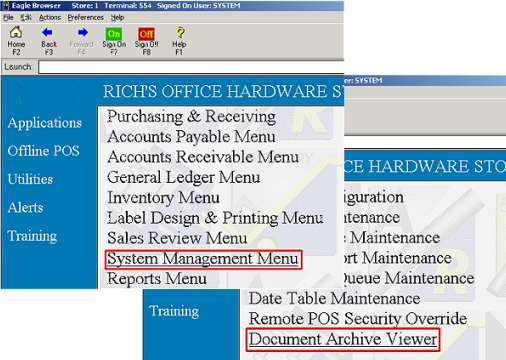
From the Eagle Browser, click System Management Menu, then click Document Archive Viewer.
Locate the document you want to view or print. The documents display by customer number, in reverse date order (most current documents to oldest documents). To help you find a particular document, you can:
Narrow your search to a particular range of document numbers by entering a value in the "Number From" and "Number To" fields, and then pressing ENTER.
Narrow your search to a particular range of customers by clicking Lookup, selecting "Customer and Job," entering a range of customers and (optionally) document dates, and then pressing ENTER.
Narrow your search to a particular range of document dates by clicking Lookup, selecting "Customer and Job," entering a range of document dates, and then pressing ENTER.
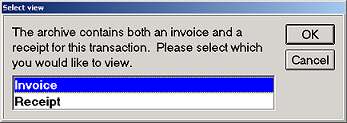
Once you've located the correct document, click on it, and click Display. If there is both an invoice and a receipt available for this document, a dialog box displays. Click Invoice or Receipt, and click OK.
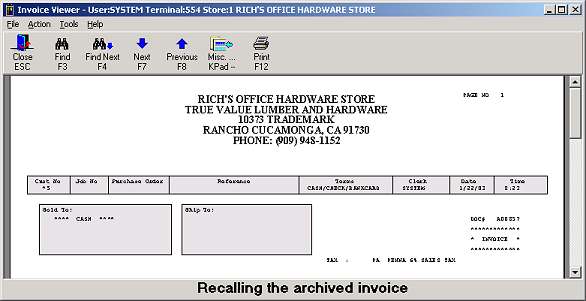
The document displays in the viewer.
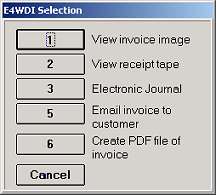
(Optional) Click Print if you want to print the document. For other options, click Misc. You can save a PDF copy of the document on your PC, email the document(s) (if you have the E-mail Invoices application), view the Electronic Journal, or view the receipt (if a receipt was generated when the transaction was created at POS).
Note: if you select "View Receipt Tape" and then press Print (F12) to print the receipt, a standard Microsoft Windows printer window displays, in which you can select a printer. This functionality is different from printing a receipt via QuickRecall, because in QuickRecall the receipt automatically prints to the receipt printer.
To access multiple documents, click on each one, then click Select.
Click Misc and you have the following options:
1 – Session Refresh Settings
E – Email the selected documents to the user
F – Fax Documents
P – Print the selected documents
The following screen displays.
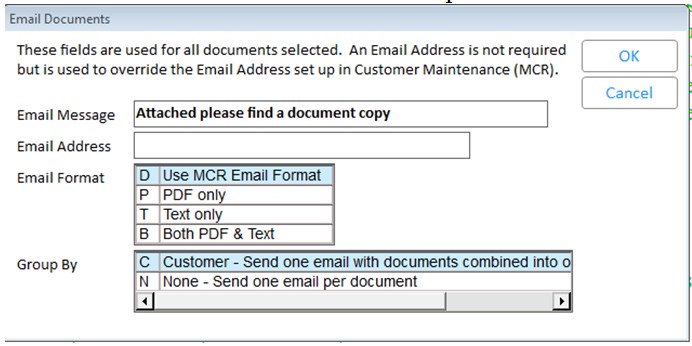
Select P, T or B and these values override the customer account setup, but do not update the MCR record
Select option D and the customer record is not set up, an error displays.
Select option C to send one email with all documents combined into one PDF attachment. If D is used, the system will send one email to each customer whose invoices are selected as long as their MCR Email Invoice/Credit flag is P (PDF Invoice only) or R (PDF Receipt only). If their MCR email format is not P or R a separate email will be sent for each invoice selected.
![]()
Document Management is not available for the ISC operating system.