After creating a report queue, you can schedule the queue to automatically run as per a certain time schedule. For example, a specific time, day of the week, date of the month, etc. You can have up to 999 queues scheduled.
This topic includes the following procedures, how to:
Use this procedure to display scheduled queues and to review the reports within a specific queue.
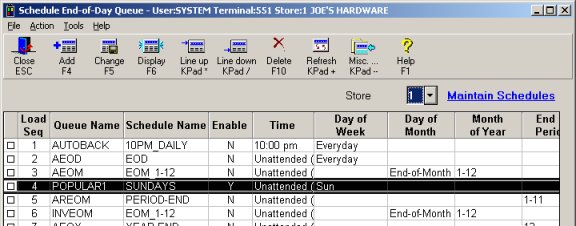
From the Eagle Browser, click System Management Menu. From the list that displays, click Schedule an End-of-Day Queue (SEQ). A window displays with scheduled queues.
The following information is available for each Queue Name:
Load Seq— This is a sequence number and it determines the order in which the queues run.
Queue Name— The name of the queue.
Schedule Name— The name of the time schedule assigned to the queue.
Enable— A Y in this column indicates that the queue is enabled and will run as per the time schedule associated with the queue name. An N in this column indicates that the queue is not enabled, even though it is linked to a time schedule.
Time— Indicates when the queue will be loaded to run. This can be a specific time, Shutdown, or Unattended.
Time Schedule (Day of Week, Day of Month, Month of Year, End of Period)— The timing details for the Schedule Name assigned to the queue. These columns specify when the queue will run if it is enabled.
To view the reports that are in a specific queue name, highlight the queue in the grid and click Display. Or, click Misc and from the Miscellaneous menu, click 1-Queue Maintenance (MEQ). The End-of-Day Queue Maintenance window displays. You can make changes to the reports in the queue from this window. Click ![]() to display a list of related topics.
to display a list of related topics.
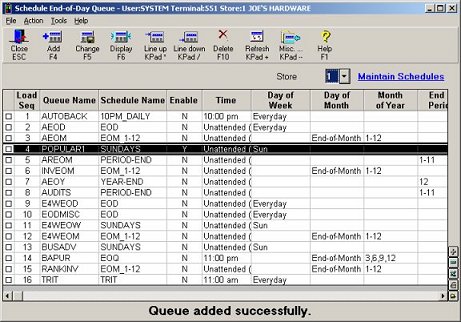
Use this procedure to enter a queue into the schedule and assign a time schedule to the queue. No more than 999 queues are allowed in the schedule.
From the Eagle Browser, click Applications and then click System Management Menu. From the list that displays, click Schedule an End-of-Day Queue (SEQ). A window displays with scheduled queues.
Review the list of queues. Click to select a line where you want to insert (enter) a queue. The queue will be added below the line you select. After the queue is entered, you can later change the placement of the queue in the list.
Click Add to display add dialog:
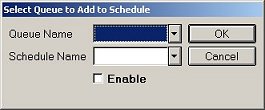
At Queue Name, select the name of the queue from the list.
At Schedule Name, select a time schedule from the list. If none of the time schedules in the list suit your needs, you can create your own schedule. Click here to go to the topic for that procedure.
If you want to enable this queue, click the check box for Enable. You can also enable/disable the queue from the SEQ window. Click here to go to the Change section of this topic for more information.
Click OK. The dialog closes and the queue is added to the schedule.
Once a queue has been added to the schedule, you can modify the scheduled queue.
From the Eagle Browser, click Applications and then click System Management Menu. From the list that displays, click Schedule and End-of-Day Queue (SEQ). A window displays with scheduled queues.
To enable or disable the queue, highlight the queue in the grid. Click the Enable field and then type a Y or N. Click Change.
To select a different time schedule, highlight the queue in the grid. Click the Schedule Name field and then click the down-arrow that displays. In the dialog that displays, select the schedule name. Click OK and the dialog closes. Click Change. The schedule name and its associated date and time display in the grid. To review the date/time information for all available time schedules, click the Maintain Schedules link in the SEQ window (next to the Store field). For more information about schedules, click here to go to the Schedules topic.
To change the order of the queue in the schedule (the Load Seq number), use the 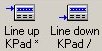 buttons. Press the appropriate button until the queue is in the correct location. No more than 999 queues are allowed.
To remove a queue from the schedule, delete the queue from the schedule. Click here to go to the Delete section of this topic for more information.
If a queue is no longer needed in the schedule and you want to completely remove the queue from the schedule, you can delete it. If the queue may be used again, then disable the queue, don't delete it (see the Change section of this topic). Deleting the queue from the schedule only removes the queue from SEQ window, it does not delete the report queue itself.
From the Eagle Browser, click Applications and then click System Management Menu. From the list that displays, click Schedule and End-of-Day Queue (SEQ). A window displays with scheduled queues.
In the grid, highlight the queue you want to delete and click the check box to place a checkmark in the box.
Click Delete. When prompted if you are sure, click Yes.