Purchase orders on the Eagle can be automatically created by a suggested order, or may be created manually when you know what you want to order. When you create a manual purchase order using PO Worksheet (POW), you can either add items one at a time, or use the Inventory Viewer to add them by groups. Once you have added items to a purchase order, you can have the system suggest the needed quantities, or you can manually enter the amounts you want to order.
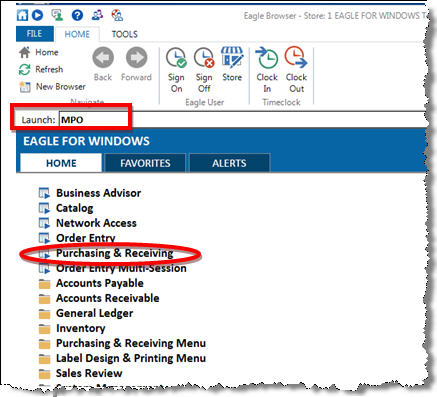
From the Eagle Browser, type MPO in the launch bar, and press Enter. (Alternatively, you can click Purchasing & Receiving from the Browser menu.)
From the Purchasing & Receiving window, click “Add P.O.,” or simply press F4. When prompted, accept the default of 1-Normal PO.
In the Create Normal PO dialog that displays, do the following:
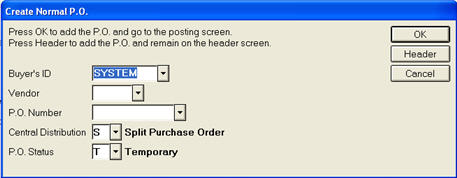
At Buyer's ID, enter the buyer (defaults to the signed-on user)
At Vendor, enter the vendor for which you are creating the purchase order
At PO Number, enter a number, or leave the field blank to have the system assign one
At Central Distribution, select the appropriate type of PO (defaults to S-split)
At P.O. Status, leave the default of T (temporary).
To save your changes and go to the PO Worksheet, press Enter (or click OK).
From the Summary tab that opens, in the dialog, enter the stores you want to include on the order. Your choices vary based upon the central distribution type you chose. Also in this dialog are choices about if you want to automatically use the suggested order feature, and if using the softgoods feature, if you want to see item attributes (defaults for the suggested order feature and attributes come from the settings in Options Configuration).
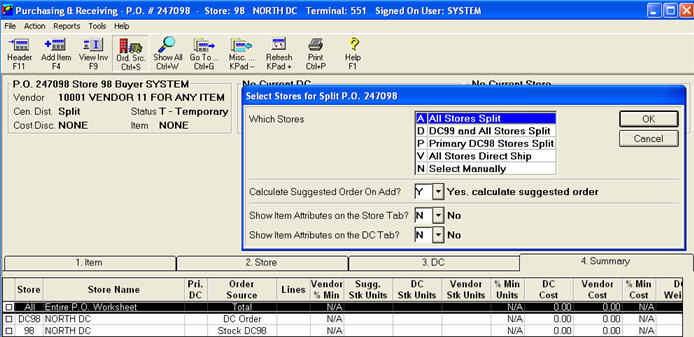
If you choose N-Select Manually to select the stores to be included on the order, you begin with essentially a blank summary tab. To select the desired stores, click Show All (Control-W) to load all available stores into the summary grid, and then click the check box in front of the desired stores.
Click Ord. Src (Control-S). In the Select Source dialog, which lists the available sources that can be used on the type of purchase order you have created, select the appropriate source and click OK.

This process changes the summary grid to display, in the Order Source column, how each store is being sourced.
Click the Item tab to begin adding items to the purchase order.
If you know the item number you want to add, click Add Item. Then enter the item number and click OK. The item is added to the item grid for each store that you selected previously.
To add quantities for each store, enter the desired quantity to order in the Sugg Order column. The quantities you enter are automatically rounded by the appropriate order multiple, based on if the quantity is coming from the DC, or directly from the vendor. Note: if you use the suggested quantity feature (see below), the quantities have already been calculated for you.
Another way to add items to your purchase order is to use the Inventory Viewer.
Click View Inv (F9).
By default, the viewer displays all of the items that are assigned to the vendor for which you are currently creating the purchase order, but you can change the lookup method.
You can select a single item by highlighting a row and clicking Select, or you can check several rows and then click Select. The last item you select displays when you return to the item tab in PO Worksheet.
Note: If you are accustomed to entering a quantity into each row, you can set up the grid to show all stores so you can use that method. Otherwise, this method is not recommended.
You can have the system automatically suggest quantities for you when you add items to the worksheet.
In the Calculate Suggested Order Settings dialog, the first option simply enables or disables the suggested order feature. The other options are the same as on the Suggested Order (RSO) report. For a definition of each field, refer to field help for RSO
Note: Each of these questions has a corresponding option in Options Configuration for which you can set the default value. The choices display here to allow you to change the settings when needed.