(Enhanced Fax or e-Invoices users only)
If you use Enhanced Fax or e-Invoices, and if you will be using pre-printed forms with the Enhanced Forms application, use the following procedure so the system will email or fax documents in a laser format, complete with column headings and lines similar to those on your pre-printed forms. This procedure applies whether you are using pre-printed forms with a dot-matrix printer or a laser printer.
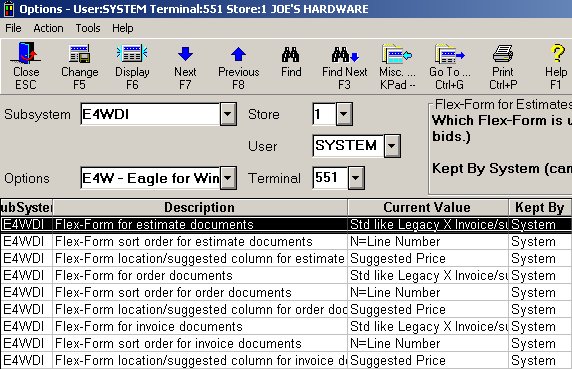
From the Eagle Browser, click System Management Menu. From the list that displays, click Options Configuration Menu and then click Document Imaging Options. Locate the Enhanced Forms options. The following is an example of the window.
Notice that each form type (estimate, order, etc.) has three options: form type, sort order, and location/suggested column. You will only be changing the form type options.
Click to select a Enhanced Form type you'll be emailing or faxing. For example, if you'll be emailing or faxing orders, click "Enhanced Form for order documents."
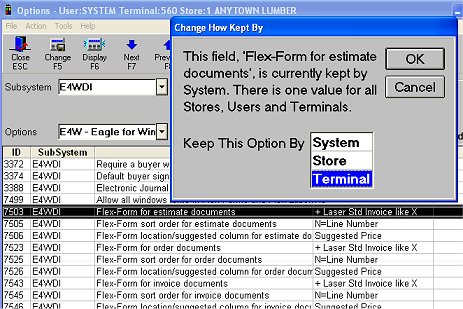
Click Misc, and select K-Change Kept By from System. Click to select Terminal in the dialog, and click OK.
Repeat steps 2 and 3 for all other form types you'll be emailing or faxing.
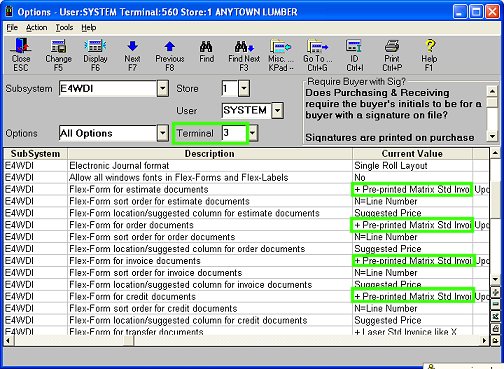
For any POS stations at which you'll be printing dot-matrix forms, verify that these form type options are still set to print a dot-matrix form.
For example, if terminal 3 is a POS station printing dot-matrix forms, enter 3 in the Terminal field and press Display. Verify the Current Value column is set to a dot matrix form for each of the form type options (they will have "pre-printed matrix" in the title).
Determine which back office PC will handle the fax rendering. This PC must have a generic Postscript driver installed, must be set up for network printing, and its network printer must be indicated in option 5042 "Fax network printer number." See the Enhanced Fax Setup job aid for more information.
On the backoffice PC determined in the previous step, do the following:
Change the form type option to one of the standard laser forms, so that emails or faxes are rendered to look like a real form (with column headings and lines).

Set Device Configuration to use Enhanced Forms. See the topic "Enhanced Forms Setup: Device Configuration" for more information.