Once you have created price formulas, you can begin applying them to execute price updates. To do this, you can use either the Item Price Changes (IPC) window or the Price Change Report (RPC).
Populate the Item Price Changes (IPC) window with the items to which you want to apply price formulas. There are several ways to populate IPC:
Using the Price Import Tool
Download Price Changes from a supplier using EDI or Power Pricer
From IPC, use the Inventory Viewer (F9) to look up the items, and then click "Select" to add them to IPC
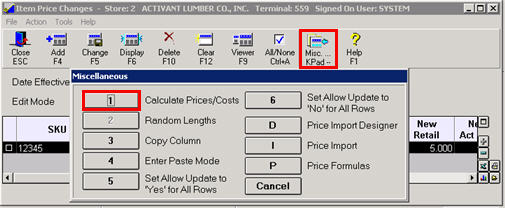
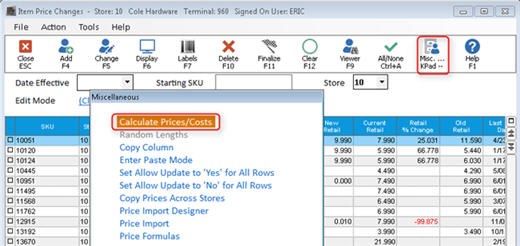
From the IPC window, click Misc and select Calculate Prices/Costs.
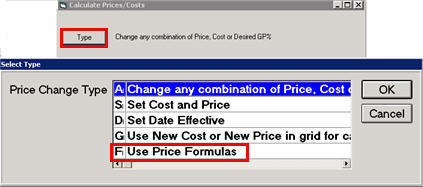
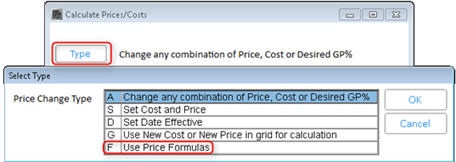
Click Type, select F-Price Formulas, and click OK.
Do one of the following:
To apply the price formulas you set up on your system, click OK in the Calculate Prices/Costs dialog. Then, from the IPC window, click Change to complete the update.
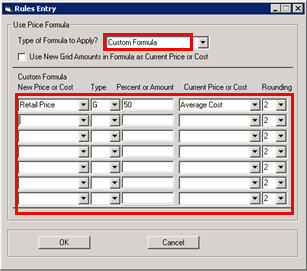
If, rather than applying existing price formulas, you want to manually enter a price formula as a "what if" scenario, click Rules. In the dialog that displays, at "Type of Formula to Apply?" select Custom Formula. Then, in the fields below, enter a custom price formula. When finished, click OK. Then, from the IPC window, click Change to complete the update.
To update your Inventory file with the new prices, run the Price Change Report (RPC) with Option F.
From the Eagle Browser, click Reports Menu, Inventory Reports, Price Change Report (RPC). Alternatively, you can type RPC in the Launch bar, and press Enter.
From the Print Setup page, review the default entries in the fields and make changes if needed. For example, you may select to spool rather than print the report.
Click Options. A page of fields displays. Select Option A "Add Range of Price Changes to Price Change File," and at Update Options, select 6-Use Price Formulas.
Click Run. When the report is finished, you can review the prices it calculated. If you spooled the report, view it in the spooler.
To update your Inventory file with the new prices, run the Price Change Report (RPC) with Option F.