(Enhanced FAX users only)
If you are new to Enhanced FAX, use the following procedure to install it. This procedure assumes your system meets all the Requirements for Enhanced FAX.
![]()
Complete the Install procedures at each backoffice PC that has the Eagle Listener program installed. The Install includes the following— HP Laserjet III Driver Install and Device Configuration.
Driver Installation for Windows 7
Click Start, Devices and Printers. In the window that displays, click Add a Printer.
Select "Add a local printer."
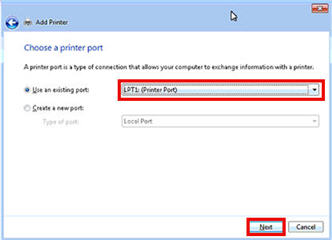
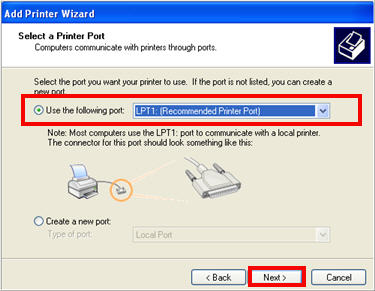
Use the existing port of LPT1. Click Next.
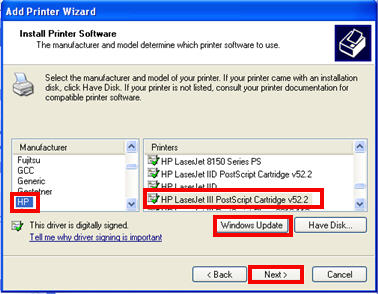
Click Windows Update to pull new drivers down so they are available in the list.
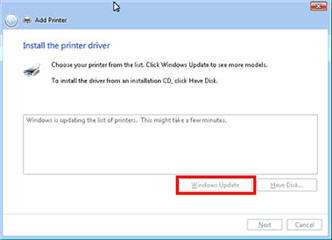
In the Manufacturer column, select HP. In the Printers column, select HP LaserJet III PostScript Cartridge v52.2.Then click Next.

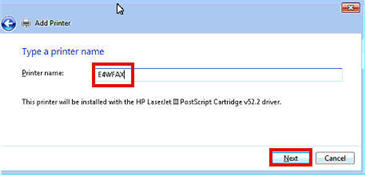
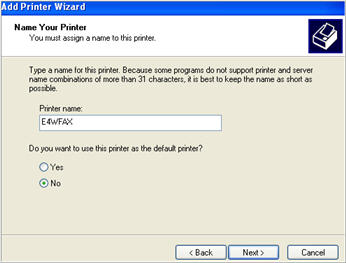
Name the printer E4WFAX, and click Next.
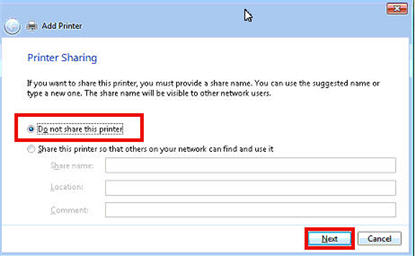
Make sure “Do not share this printer” is selected, and click Next.
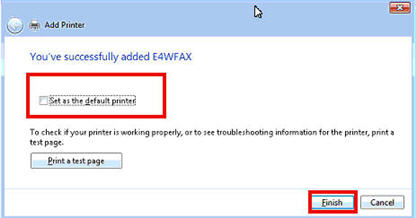
Un-select "Set as the default printer," and click Finish.
Right click the E4WFAX printer, and select Printing Preferences. Click Advanced on the bottom right.
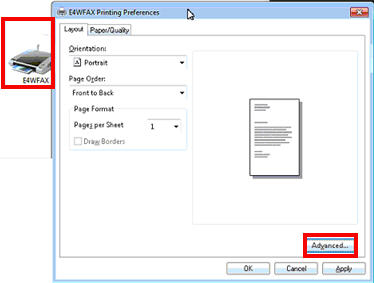
Expand the PostScript Options and set the PostScript Output Options to Optimize for Portability. Click OK, and then click Apply.

Driver Installation for Windows XP
Click Start, Settings, Printers and Faxes.
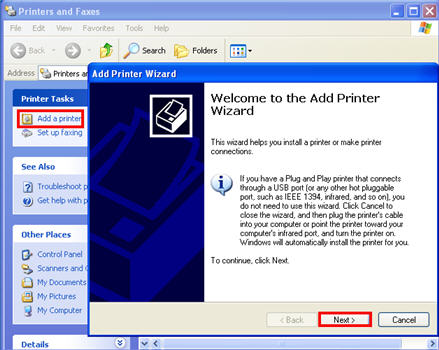
Click Add a Printer. When the Wizard displays, click Next.
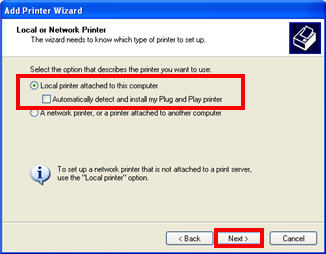
At Select Local or Network Printer, click Local printer attached to this computer, and un-select "Automatically detect and install my Plug and Play printer." Click Next.
Use the existing port of LPT1. Click Next.
Click Windows Update to download new drivers so they are available in the list. Then, at Install Printer Software, in the Manufacturer column, select HP. In the Printers column, select HP LaserJet III PostScript Cartridge v52.2. Then click Next.
At Printer Name, type E4WFAX, select No for the default printer, and click Next.
At Printer Sharing, select "Do not share this printer," and click Next .
At Print Test Page, select No, and click Next.
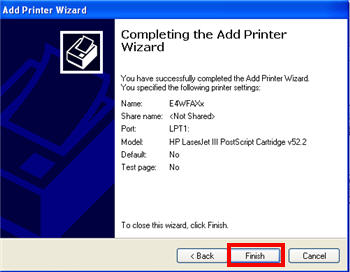
At the Completing Add printer Wizard, click Finish.
Right-click on E4WFAX in the list of printers, click Printing Preferences, and click Advanced in the right bottom of the window that displays.
Expand the PostScript Options, and set the PostScript Output Option to Optimize for Portability. Click OK.
Click OK to exit the Printing Preferences window.
From the PC at which you installed the Adobe Postscript Driver, open the Eagle Browser. Click Utilities (in the left pane) and click Device Configuration.
In the Device column, click FAX Printer to highlight it. Press Enter.
In the dialog, select the E4WFAX entry from the list. Click OK.

Click OK again to exit the FAX Printer dialog. Click Close (F2) to exit.
Once you've completed the Install at each PC that has the Eagle Listener program installed, the next task is to set up options and defaults. Click here to go to that topic.