(Document Scanning users)
Attributes link your scanned or imported documents to specific records (such as SKUs, customers, invoices, purchase orders, etc) in Eagle applications. For example, if you select Inventory Item in the "Document is related to" field, and enter a SKU in the "Item Number" field, then when you display that SKU in Inventory Maintenance, you can link directly to the corresponding document. See the topic "View Documents from Eagle Applications" for more information.
When you first scan or import a document into the Document Scanning application, you can specify attributes for the document, Or, if you purchased the barcode recognition feature (OCR), your Eagle auto-assigns document attributes. However, sometimes you may need to modify attributes of documents you have already scanned. This topic explains how. You make these modifications in the scanned document staging area on your PC, called the Document Scanning Queue.
![]()
Attributes of scanned and imported documents can only be modified from the Document Scanning Queue, not from the Archive Document Viewer. If you need to modify attributes of an archived document, restore it to the Document Scanning Queue, modify its attributes, and then re-archive the document.
In the grid, click the attribute you want to change, and enter the new information.
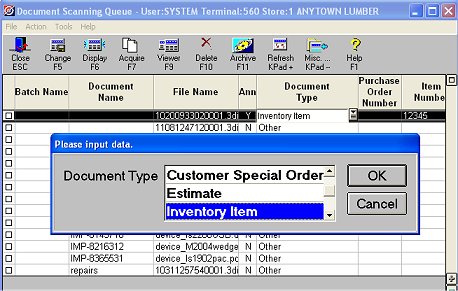
Some attributes display an arrow when you click on them; this means you can select from a drop-down list of options rather than typing your selection, and your selection is validated against the corresponding file on your Eagle System. If an arrow displays, click it to display the selection dialog, click to select one of the options, and then click OK.
Click Change to save your changes.