(Document Scanning users)
Use the following procedure to import electronic documents (Micosoft Word files, Adobe PDF files, image files, etc.) into the Document Scanning (DS) application. Electronic documents must not exceed 250KB in size. Executable type files cannot be imported; this includes files with extensions .EXE, .BAT, .VBS, and .SCR.
You can also scan documents into DS. Click here for the scanning procedure.
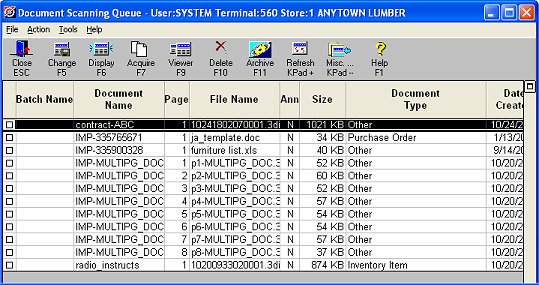
. Display the Document Scanning Queue. For a definition of each field in the viewer, click here.
Click Acquire. The Document Attributes dialog displays. Attributes link your scanned or imported documents to specific records (such as SKUs, customers, invoices, purchase orders, etc) in Eagle applications. For example, if you select Inventory Item in the "Document is related to" field, and enter a SKU in the "Item Number" field, then when you display that SKU in Inventory Maintenance, you can link directly to the corresponding document.
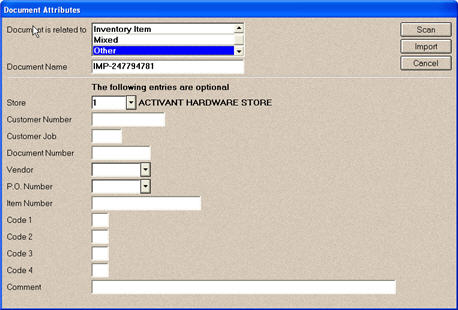
Select the desired attributes. You can select the application the document you are scanning / importing is related to, store, customer, job, customer order number, vendor, PO Number, and SKU. You can also enter codes to assign to the documents, which can help you manage your scanned documents because you can group them together by code.
Note that the attributes you select in this dialog are applied to all documents in this importing session (unless you choose to change them between imports).
Click Import. The Document Imaging File Import dialog displays.
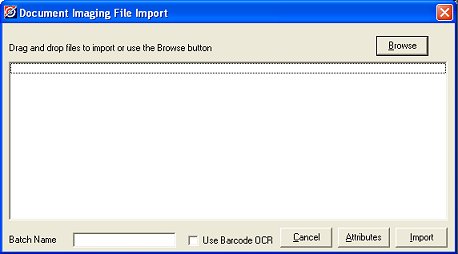
Click Browse, and locate the file(s) you want to import on your PC; or, drag and drop the file(s) you want to import.
If you need to return to the Attributes dialog, click Attributes. When finished changing the attributes, click Import to return to the File Import dialog.
If desired, assign a Batch Name. This helps you group documents together in the Document Scanning Queue.
If you are importing a TIF file and you've purchased the barcode recognition feature, click Use Barcode OCR. The system reads any valid Epicor barcode and auto-assigns document attributes (which override the attributes set up in the document attributes screen). Note that in any given import session, you can mix bar-coded and non bar-coded documents.
Click Import. In a moment, the import is complete.

The imported document is now listed in the Document Scanning Queue viewer, where you can change any attributes you assigned to the document. If you need to change the document itself, double click on it and it will automatically open in the associated program.
Once you are satisfied with the document, archive it so that it will reside on the Eagle server.