Once you have created a batch of POs to be received, you can use it in Eagle Mobile.
To enable your security for Eagle Mobile, from the Eagle Mobile main menu, tap Signon, and enter your User ID and Password when prompted.
![]()
If the terminal record on the Eagle is set up to use Special Security, you will automatically be prompted to sign on to Eagle Mobile.
(Multistore users only) If you want to change the store in which you'll be working, tap Tools and select Change Store. When the list of stores displays, tap the appropriate store, and then tap OK.
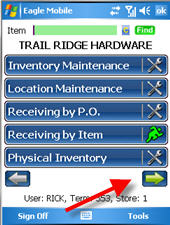
From the Eagle Mobile main menu, tap Batch Receiving. If you don't see it in the list, tap the down-arrow to display the rest of the selections.

On the screen that displays, enter the batch ID. There is no validation or lookup for the Batch ID, so you must know the exact Batch ID when entering it (note that Batch IDs are not case-sensitive). If a user enters a Batch Id that does not exist, when they search for an item they will continually get the error that the item is not found on any POs.
Once a batch is entered, the procedure is just like Receive by Item. When you scan or enter an item number, and any PO in the batch that has that item on it, the item displays. If only one PO with that item exists, you are taken directly to the Receive Item screen. If the item does not appear on any PO in the batch, you receive a warning.