This topic discusses how to view Eagle Mobile Inventory screens, which include Stocking, Pricing, History, Vendor, PO, Committed Qty, and Price Check. In addition, this topic describes how you can make changes on the Codes screen and/or the Update screen.
With the exception of the Price Check and Update screens, the various Eagle Mobile Inventory screens are abbreviated versions of the corresponding screens in Eagle for Windows. The item information that displays on your Eagle Mobile is actual live data from Inventory Maintenance.
To enable your security for Eagle Mobile, from the Eagle Mobile main menu, tap Signon, and enter your User ID and Password when prompted.
![]()
If the terminal record on the Eagle is set up to use Special Security, you will automatically be prompted to sign on to Eagle Mobile.
(Multistore users only) If you want to change the store in which you'll be working, tap Tools and select Change Store. When the list of stores displays, tap the appropriate store, and then tap OK.
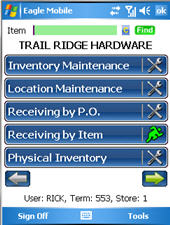
From the Eagle Mobile main menu, tap Inventory Maintenance.
The default screen you indicated in the Setup screen displays. In this example, the Stocking screen is displayed.
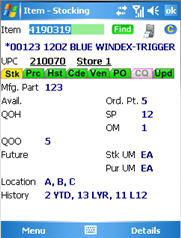
Display an item by doing one of the following:
scan the item's barcode
type the item's SKU number
enter the item's UPC code and then tap Find.
To view another screen other than the default screen, simply tap the appropriate tab, or tap Details (or press F2) and select a screen. You can select:
Prc [pricing]
Hst [history]
Cde [codes]
Ven [vendor]
PO [purchase order]
CQ [committed quantity on orders/special orders]
Upd [update]
Price Check (see step 6 for more information about this screen)
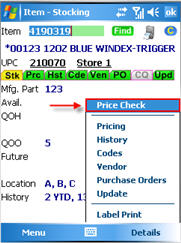
To display the Price Check screen, tap Details (or press F2) and select Price Check.
The Price Check screen can be shown to a customer because it contains only customer-friendly information including Retail, Promo, List, and Loyalty pricing, as well as Available quantity, Quantity on Order (QOO), Location, and Manufacture Part.
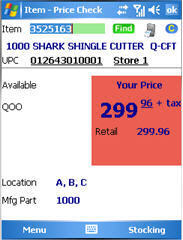
(Multistore users) To view multistore pricing information, click the "Store X" hyperlink (where X = the lock-in store). If the Store X field is not a hyperlink, this means that the SKU doesn't exist in your other stores, or that you do not have the security to view other stores' information.
To return to any of the other screens, tap Stocking at the bottom right of the screen. The Stocking screen displays, and from there you can tap any of the other tabs to display a different screen.
To make changes to an item, tap the Update (Upd) or Codes (Cde) tab. Display the appropriate item if it is not already displayed, and enter the new information in the desired fields.
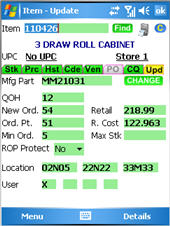
On the Update tab, you can change the following fields: Mfg Part; Qty on Hand; New Order Qty; Retail; Order Point; Replacement Cost; Location 1, 2, or 3; User Codes 1, 2, 3, or 4; Minimum Order Point, Max Stock Level and the ROP Protect Flag. For more information about any of these fields, see the topic "Inventory Maintenance Field Help." On the Codes tab, you can update any of the 20 user codes.
![]()
If any fields display in yellow, this indicates that there is a change pending to this SKU which could override your change, such as a price change, FIL (flexible inventory load) change, or PIP (physical inventory) change.
To print a label, tap the print icon![]() .
.
To clear the screen, tap ![]() .
.
To capture a UPC code for an item:
With the item displayed, tap the underlined field to the right of UPC (the field reads No UPC if no UPCs are yet on file for the item).

On the UPC Capture screen that displays,
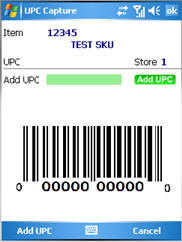
scan the item's UPC code, and tap Add UPC.
When you are finished using Eagle Mobile Inventory, you can:
Tap OK. This exits the Inventory application and returns you to the main menu.
Tap Menu. This leaves the Inventory application running, but returns you to the main menu, where you can open another application. If you go back to the Inventory application, it displays in whatever state you left it in when you tapped Menu. Notice that the "running" icon ![]() displays on the main menu to indicate that the application is still running.
displays on the main menu to indicate that the application is still running.
To sign off your security from the Eagle Mobile unit, tap Tools from the main menu, and select Sign Off.
Depending on your Eagle Mobile Inventory setup screen, you may need to finalize your changes.
![]()
If you enter an SKU on the Eagle Mobile main menu, the screen you set up as the default screen displays. You can go to the Stocking screen by tapping Stocking. From there, you can display the other Eagle Mobile Inventory screens.