(Bill of Materials/Finished Goods users only)
The following procedure explains how to create an order for finished goods items, and assumes you are already familiar with the Bill of Materials application.
In Point of Sale, create an order.
If you set up a Finished Goods account, be sure to enter it in the Customer field when creating the order.
Note: You may decide to use the same order on a regular basis for your finished goods. In other words, you do not have to create an order each time you generate a finished item. If you choose to use this method, it might be useful to use the same order for a designated time period-- for example, one month. That way, you'll have an historical picture of all finished goods for the month.
In the Item (SKU) field, enter the appropriate Bill of Materials SKU, from which you'll select components.
In the Quantity field, type 1 (or the correct quantity of finished items you're creating) and press ENTER. The Bill of Materials Posting window displays.
Make any necessary modifications to the components. See the Bill of Materials (BOM) topic "Adding Components to a BOM Header" for specific instructions.
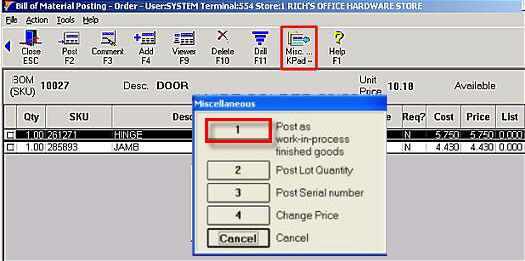
When you have made all the necessary modifications, click Misc, and then click "Post as work-in-process finished goods."
In the dialog box that displays, enter the SKU you want the system to use to track the finished item. You'll eventually use this SKU to sell the finished item.
Press Total, and save the document. The finished item is now on order, and the shop can begin building it. If you have a shop order printer configured, the document will print to this printer as well.
When the finished item has been built and is ready to go into inventory, follow the procedure in the topic "Marking a Finished Goods Item 'Built'."