
Once the merchandise for a purchase order has arrived at your store and you have checked it against the vendor's packing slip, you are ready to post your receipts in the Purchasing and Receiving window.
Note: If you receive certain POs in multiple shipments, and therefore have the Backorder field on the PO set to Y, you may want to use the "Click Mode" to make receiving quicker and easier.
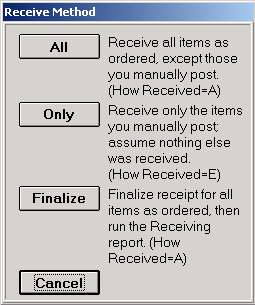
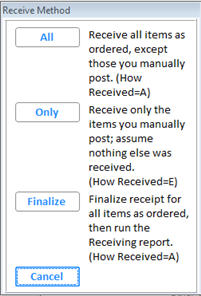
From the Purchasing and Receiving window, with your PO displayed, click Receive. The Receive Method dialog displays.


If the merchandise was received EXACTLY as ordered, you can click Finalize to bypass the Receiving window and proceed directly to the Receiving Report, where you'll finalize the PO. The PO number and vendor will automatically be entered on the From/To page of the Receiving Report.
If there were any discrepancies between what you ordered and what you received, Click All or Only. The receiving screen displays, with the purchase order displayed in a grid.
Note that once you select All or Only, you are not required to choose a receiving method again for that particular PO. However, you can still change the receive method. For more information on changing the receive method, click here.
Depending on which receiving method you choose, click one of the following to take you to the procedure steps:
Double-click on the first item you need to change.
If the item isn't visible on the screen, you can look up the item if you know its SKU, manufacturer part number, alternate part number, or UPC number.
In the Received (Stk) box, Enter the quantity you actually received.
In the Cost (STK) box, enter the new cost of the item if its cost has changed.
Note: If you have Advanced Special Order and you change the cost of an item that is also on a special order, the cost is automatically updated on the special order.
(Optional) In the Retail box, enter a new retail, or blank out the displayed retail and the system will calculate a new one based on the new cost and the desired gross profit.
Press ENTER to post the changes you made.
Note: the system will prompt you for additional information if the item you just posted has a serial number, if its Lot Item flag is Y, or if its Tally flag is a 3 or 4. Click here for more information about entering the requested information.
Repeat steps 1-5 for each item you need to change. Any item you don't change will be considered received exactly as ordered.
If you need to add an item to the purchase order, click here for the procedure steps.
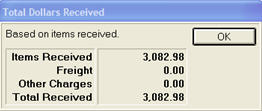
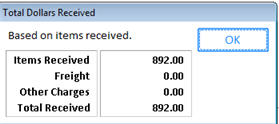
If you want to view the total dollars received on the PO, click Misc and select 8 “Show total dollars received.” If the PO has a PO Adder, the Adder is included in the total.


When you are finished receiving the PO, you must review it and then finalize it.
In the Item (SKU) box, enter the SKU of the first item you received, or in the LINE box, enter the line number of the item, and press ENTER.
If you don't know the SKU or the line number, click here for other lookup methods.
In the Received (Stk) box, enter the quantity you actually received.
In the Cost (STK) box, enter the new cost of the item if its cost has changed.
Note: If you have Advanced Special Order and you change the cost of an item that is also on a special order, the cost is automatically updated on the special order.
(Optional) In the Retail box, enter a new retail, or blank out the displayed retail and the system calculates a new one based on the new cost and the desired gross profit.
Press ENTER to post the changes you made.
Note: the system will prompt you for additional information if the item you just posted has a serial number, if its Lot Item flag is Y, or if its Tally flag is a 3 or 4. Click here for more information about entering the requested information.
Repeat steps 1-5 for each item you received. Any item for which you don't post a quantity received will be considered not received at all.
If you need to add an item to the purchase order, click here for the procedure steps.
When you are finished receiving the PO, you must review it and then finalize it.
![]()
A QuickTip video that discusses receiving POs is available. To view this QuickTip, go to http://www.activant.com/eagle-customer-support/, and click Training Browser. When the Training Browser displays, click Videos in the left pane, click Quick Tips, and then select Purchasing and Receiving.